Archive | December, 2011

Pickled Vegetables

27 Dec

Now that the holiday dinner meals are over, you might be noticing a surplus of vegetables in your fridge. Pickling is a simple and delicious way to keep your veggies from spoiling and turn them into an instant healthy homemade snack.

A jar of pickled vegetables.

  • one eggplant, right before using cut the eggplant into large chunks
  • 1 cup baby carrots
  • 1 cup dried persian shallots, soak in water for about one day until the shallots have re-hydrated, then drain all the liquid
  • 1 cup cauliflower cut into bite size pieces
  • 1 tsp each of salt, pepper, cinnamon, turmeric and cumin
  • 1L red or white vinegar
  • one sterilized glass jar (1L) to store pickled vegetables

Of course, other combinations of vegetables are also possible.

Before starting, it is important to use only sterilized (or at the very least, thoroughly cleaned) kitchen supplies.  This provides a longer shelf life for the pickled vegetables.

In a large pot on high heat, add in the carrots, shallots and spices. Mix well. Add enough vinegar to cover the vegetables. Bring the vinegar to a boil and then turn down to a simmer.

Carrots, Persian shallots with spices simmering in vinegar.

Once the carrots have begun to soften (about 5 minutes) add in the eggplant.  Add more vinegar such that the vegetables are completely covered. Cook for another 5 minutes and then add in the cauliflower. Again add more vinegar if needed. Cook for 5 more minutes or until the cauliflower is al-dente (try not to overcook the cauliflower because they taste better a little firm and crisp). Remove from heat and set aside to cool.

After the vegetables have finished cooking, set aside to cool.

Store vegetables and pickling juice in a jar at room temperature.  These pickled vegetables will be good for several months and are great as a quick healthy tangy snack and/or accompanied as a side with rice.

A huge thank you to Golnaz for sharing her family recipe with me.

Holiday Cards

20 Dec

Supplies needed to make your own card.

This isn’t a post related to food, cooking, eating or food places in anyway but it is about creating something beautiful from unused (and often discarded) items. The art of transforming unused or unwanted objects into something of value is known as upcycling. My upcycling idea is to turn shopping bags into homemade holiday cards. In fact, I appreciate the gesture of a handcrafted card much more than receiving a store bought card. This is also an ideal project for kids and, of course, can be done any time of the year for any event. I have turned many bags into birthday cards, Valentine’s day cards, get-well cards, anniversary cards, thank you cards, etc.

What you will need:

  • An assortment of paper bags (e.g. shopping bags from clothing stores, gift bags, etc.)
  • Scissors
  • Markers
  • Glue
  • Envelope
  • Tape
  • Pencil with eraser
  • (optional) Coloured paper
  • (optional) Any other craft supplies you may want to use on your card such as glitter, stickers, ribbons, etc.

Although there are many variations, the following are step-by-step instructions for a design of a Christmas card.  I was inspired by the red and white paper bags that I had and the upcoming Christmas holidays.

Step 1:  I am using the white bag as the base of the card and the red bag to make a Christmas tree. Remove the string from the bag if necessary. Save the string for later use.

Step 2: Cut out a rectangle that is twice as long as the envelope. There is unwanted writing on the card but this will be fixed in Step 4.

Step 3:  Fold the paper in half and ensure that it fits into the envelope. If not, trim the card accordingly.

Step 4: Since there is writing on the base paper of the card, cut a strip of coloured paper just big enough to cover the words. In this case, I had enough material for a cutout from a blue bag I had previously made a complete card from. I used craft scissors to create the jagged edges around the cutout.

Step 5:  Now cut a big enough patch from the red bag to make a tree.

Step 6: Flip the red paper over and using a pencil, draw the shape of a Christmas tree.  It doesn’t have to be perfect or even symmetric.  Cut out the shape of the tree.

Step 7: I usually like to make a thin border on the front of the card but of course, you don’t have to.  Before glueing, position the blue strip and red tree to preview how the card will appear.  Leave enough room at the top to write a small greeting.

Step 8: Once you are satisfied with the layout of the card, use a pencil to write in the greeting. Trace the words with a black marker.

Step 9: I wanted my card to be cheerful and festive so I coloured in  “Happy Holidays” in a  variety of bright colours. After the ink has dried, erase any pencil marks.

Step 10: Glue the blue strip first, then the tree. At this point, the card is done if you wish. I wanted to decorate my tree with some ribbon and sparkles.
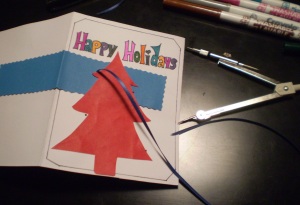
Step 11: Using a sharp point (in this case, the tip of my math compass worked nicely) poke four small holes along the tree where you think appropriate.   Thread the ribbon through the first hole. Continue threading through all the holes.

Step 12: The ribbon will now be visible on the inside of the card. Tape the two free ends of the ribbon.

Step 13: Using some plain or coloured paper, cut two rectangles just smaller than the actual card.

Step 14: Glue the precut yellow paper to each half of the inside of the card.  Once the glue has dried, you can write your personalized message on the inside.

Step 15: Lastly, I had some rhinestone stickers which I thought would make perfect tree ornaments. Place them however you wish.

Step 16: Mail your card!

No Bake Chocolate Pie

13 Dec

A slice of no bake chocolate pie.

Here’s a no bake chocolate pie recipe courtesy of Eagle Brand with a few personal tweaks and tips.

All the ingredients needed to make the pie.

Crushed graham crackers.

  • 22 graham crackers, crushed (an easy way to crush is to place the crackers in a ziploc bag, remove any air, close tightly and with the smooth side of a meat mallet pound the crackers until they appear as finely coarse crumbs)
  • 1/4 cup (60 mL) unsalted butter, melted
  • 28 g of a Lindt swiss dark chocolate bar
  • 1 can (300 mL) Eagle Brand sweetened condensed milk
  • 1 packet (7 g) unflavoured gelatin
  • 1/3 cup (75 mL) tap water
  • 1/2 tsp (25 mL) real vanilla extract
  • 1 cup (250 mL) fresh whipping cream
  • 1 packet (10 g) of Whip It (this is stabilizer for the whipping cream)
  • 9 inch pie plate

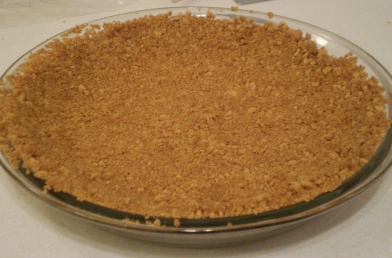
In a bowl, mix the butter and crushed graham crackers together.  Pour the mixture into the pie plate and with the back of a spoon (or the palm of your hand) flatten the crumbs along the bottom and edges of the plate until the entire surface is covered with a thin layer of the graham cracker crumbs. I found this very simple graham cracker crust on the back of my Honey Maid Graham Wafers box.

Crushed graham crackers mixed with unsalted butter.

Graham cracker crust.

On medium to high heat, in a large pot melt the chocolate with the condensed milk.  As the chocolates melts, the mixture will turn a rich dark brown and have a glossy shine to it.  Once the chocolate has completely melted, set aside to cool.

Melting chocolate with condensed milk. Indeed, this is being done in a wok. No pots were available at the time.

In a small pot, add in the water and sprinkle in the packet of gelatin. Let stand for one minute, then place the pot on a burner on low heat.  Stir until the gelatin powder is completely dissolved.  Add this to the chocolate and condensed milk mixture. Add in the vanilla extract. Again, set aside to cool.

Gelatin being added to the chocolate and condensed milk.

Pour the whipping cream into a container with a lid.  Add in the stabilizer.  Close the lid and gently shake for about five minutes.  The whipping cream should become thicker and fluffier (and appear less liquid).

Whip It added to whipping cream.

Once the the chocolate/milk/gelatin mixture has cooled, gently fold in the whipped cream until thoroughly combined. Carefully pour the mixture into the graham cracker crust pie plate.

Pouring the chocolate pie filling into the graham crust.
The no bake chocolate pie right before it is to be placed in the fridge.

Cover with plastic wrap and place in the fridge for at least three hours so that the gelatine has had time to set.  For tastier results, refrigerate overnight.

Christkindl Market

6 Dec

Christkindl Market in Kitchener, Ontario, Canada.

Chrsitkindl markets originated in Germany hundreds of years ago and is now a common occurrence leading up to Christmas. Every year Kitchener (in Canada) hosts its own version at the beginning of December.  Many of the displays at the Christkindl market reminded me of my amazing trip to Germany in June such as the miniature replicate of Germany’s famous high speed train, the ICE.

A model of Germany's fast, famous and efficient ICE trains.

An actual ICE train I travelled on during my Germany trip.

Kitchener’s Christkindl market offers traditional German fare, shiny beautiful holiday ornaments, sweet treats, fuzzy warm winter accessories, sparkling jewelry, handcrafted toys and much much more. There is also a model railway room, children’s activities, live music and a nativity scene.

Delicate and detailed dolls' dresses.

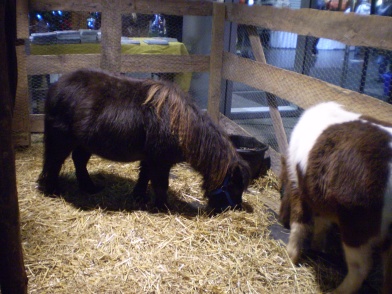
Two cute ponies that were part of the live nativity display.

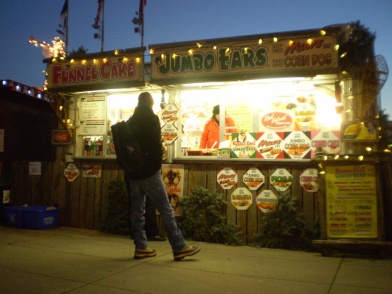
One of a number of outdoor food vendors.

Most of the hot food vendors are outside while the nonfood vendors are indoors. I tried some famous apple fritters for the first time at “Das Fritter Haus”. Essentially, these are slices of apples dipped in batter and deep fried. They were made to order and tasted like sweet soft fluffy clouds that’s been coated with sugar, cinnamon and other spices.

Six apple fritters, $4.75.

Although the weather is bitterly cold, the atmosphere is warm, bright and cheerful. Everyone is in a happy and welcoming mood. The festival is charming, unique and a perfect addition to the holiday season.